The Task List provides a great way to keep track of the status of almost everything your team is up to, and can be used in many different ways. Need something lightweight to remember which customers need to be called back? Want something a little more detailed to ensure new help center articles get written by the right people at the right time? Want the satisfaction of moving that challenging task over to the completed pile?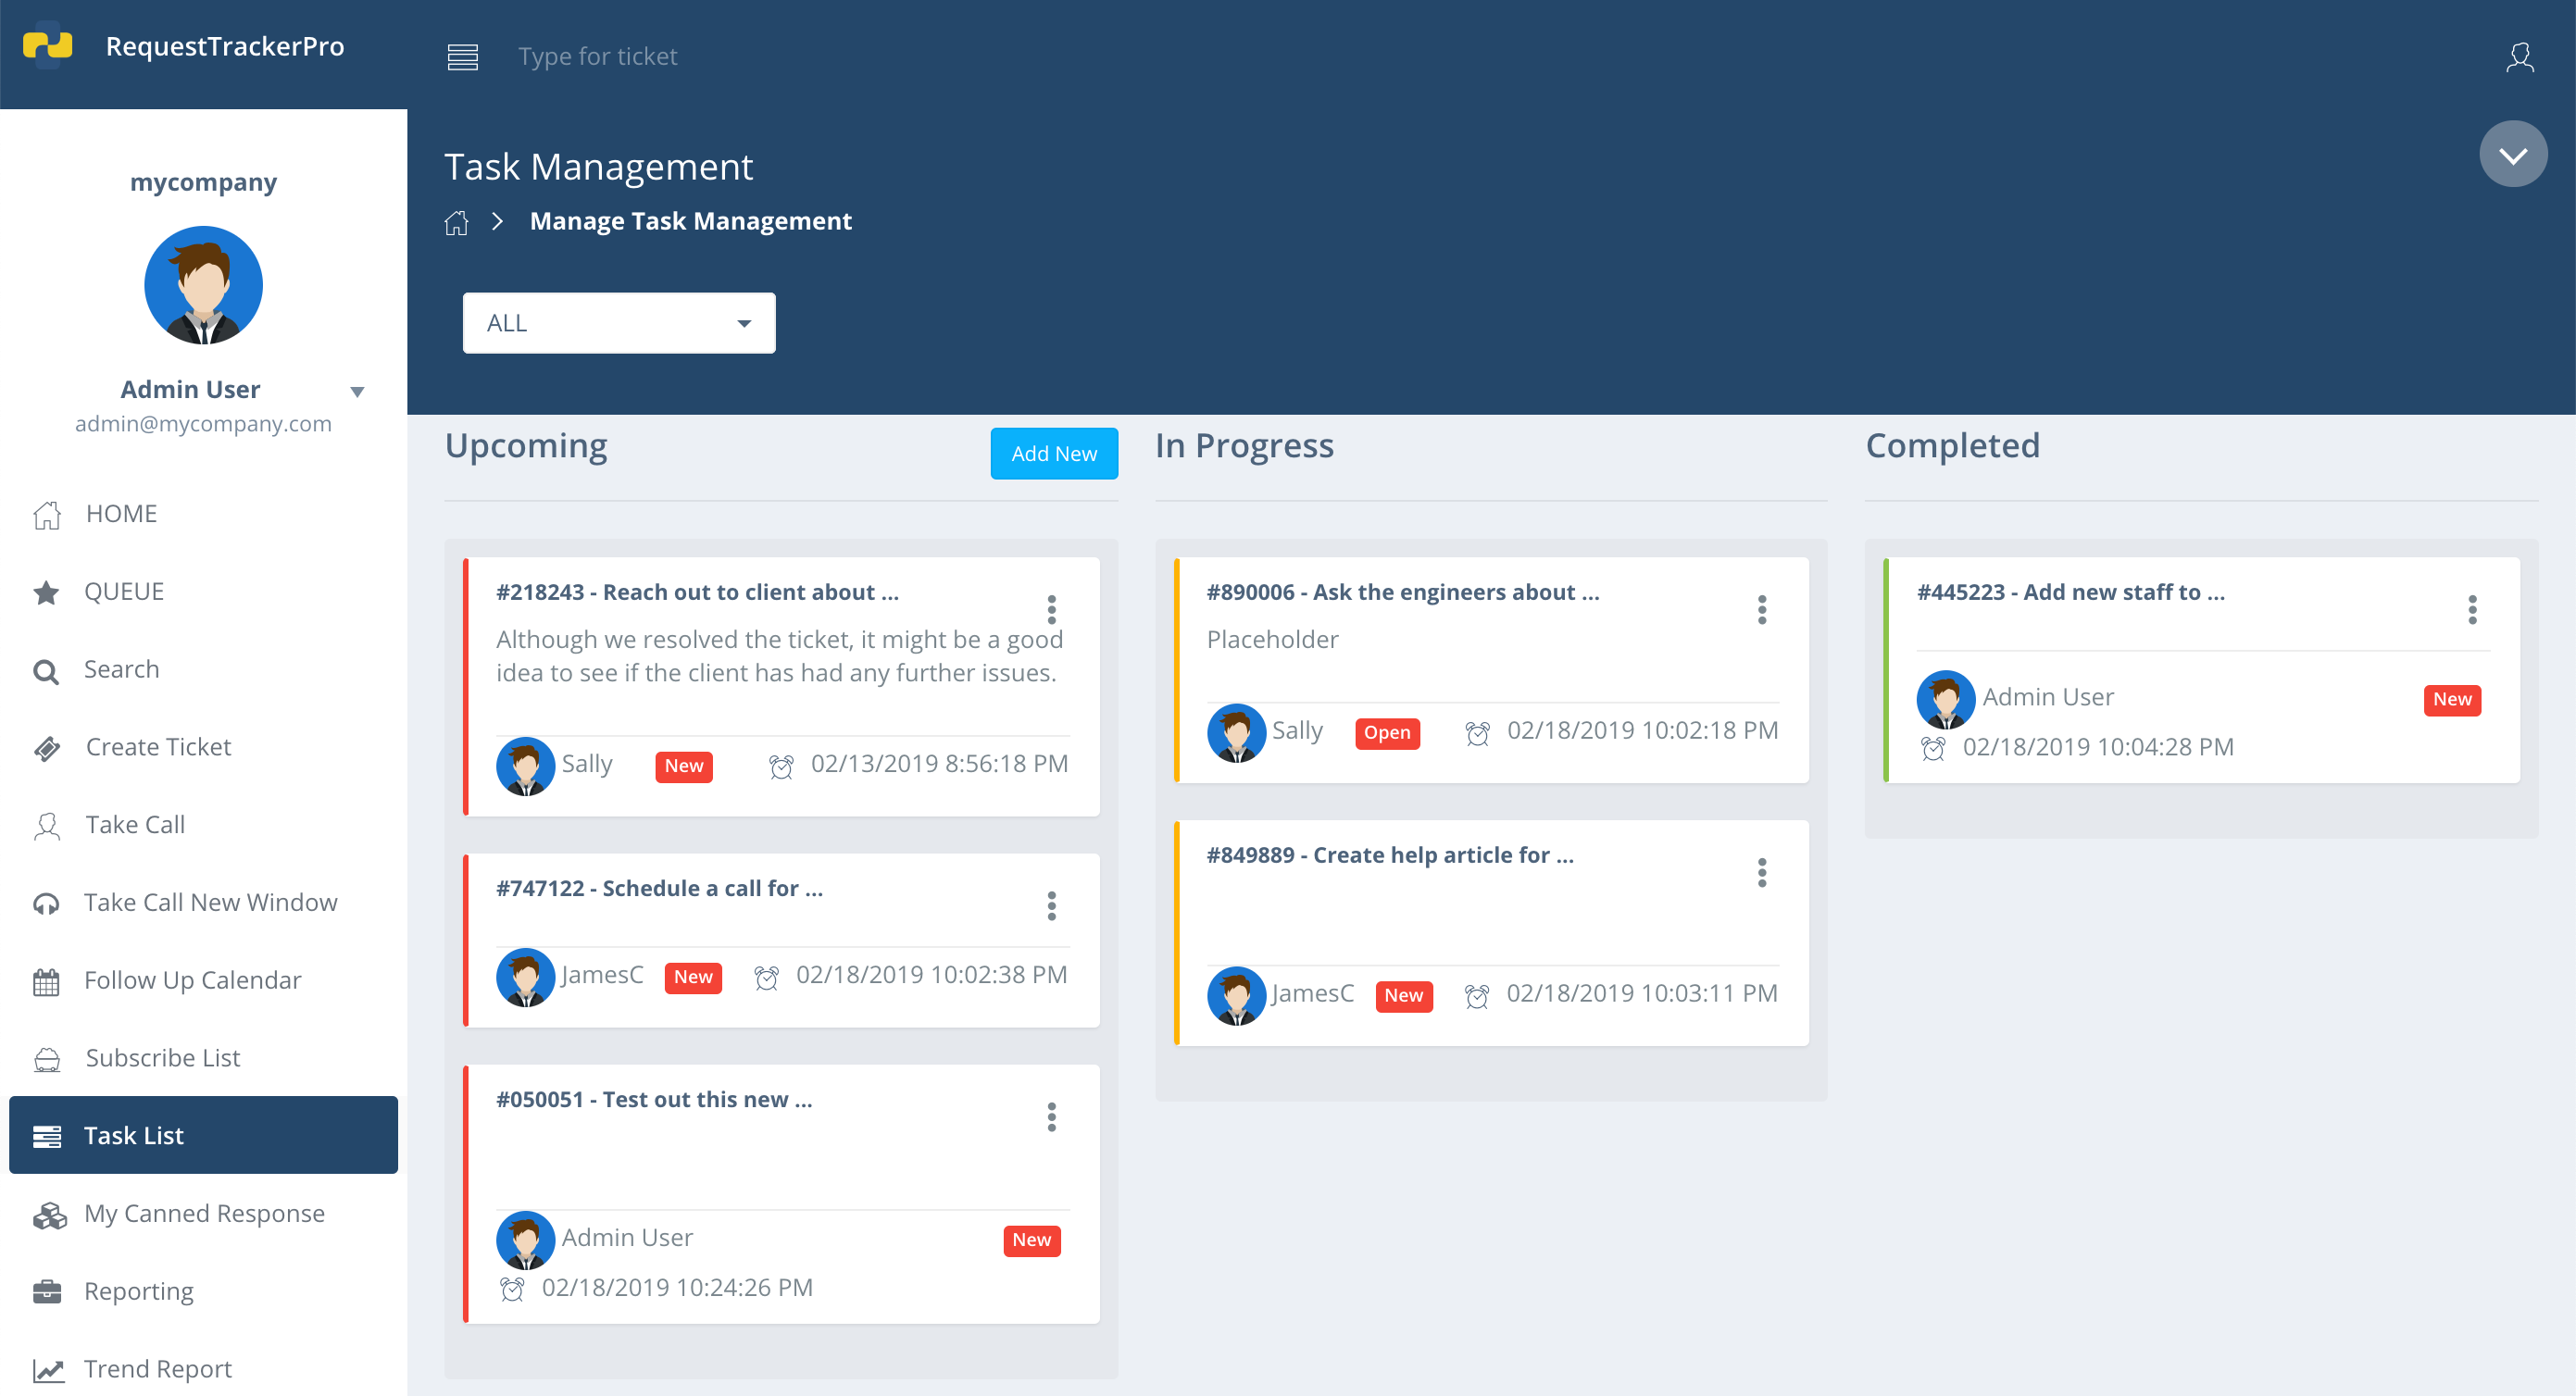
Before we begin, a quick note: although only managers and admins can create tasks, any level of user can update, edit, and complete tasks.
To get started, first click Task List from the dashboard.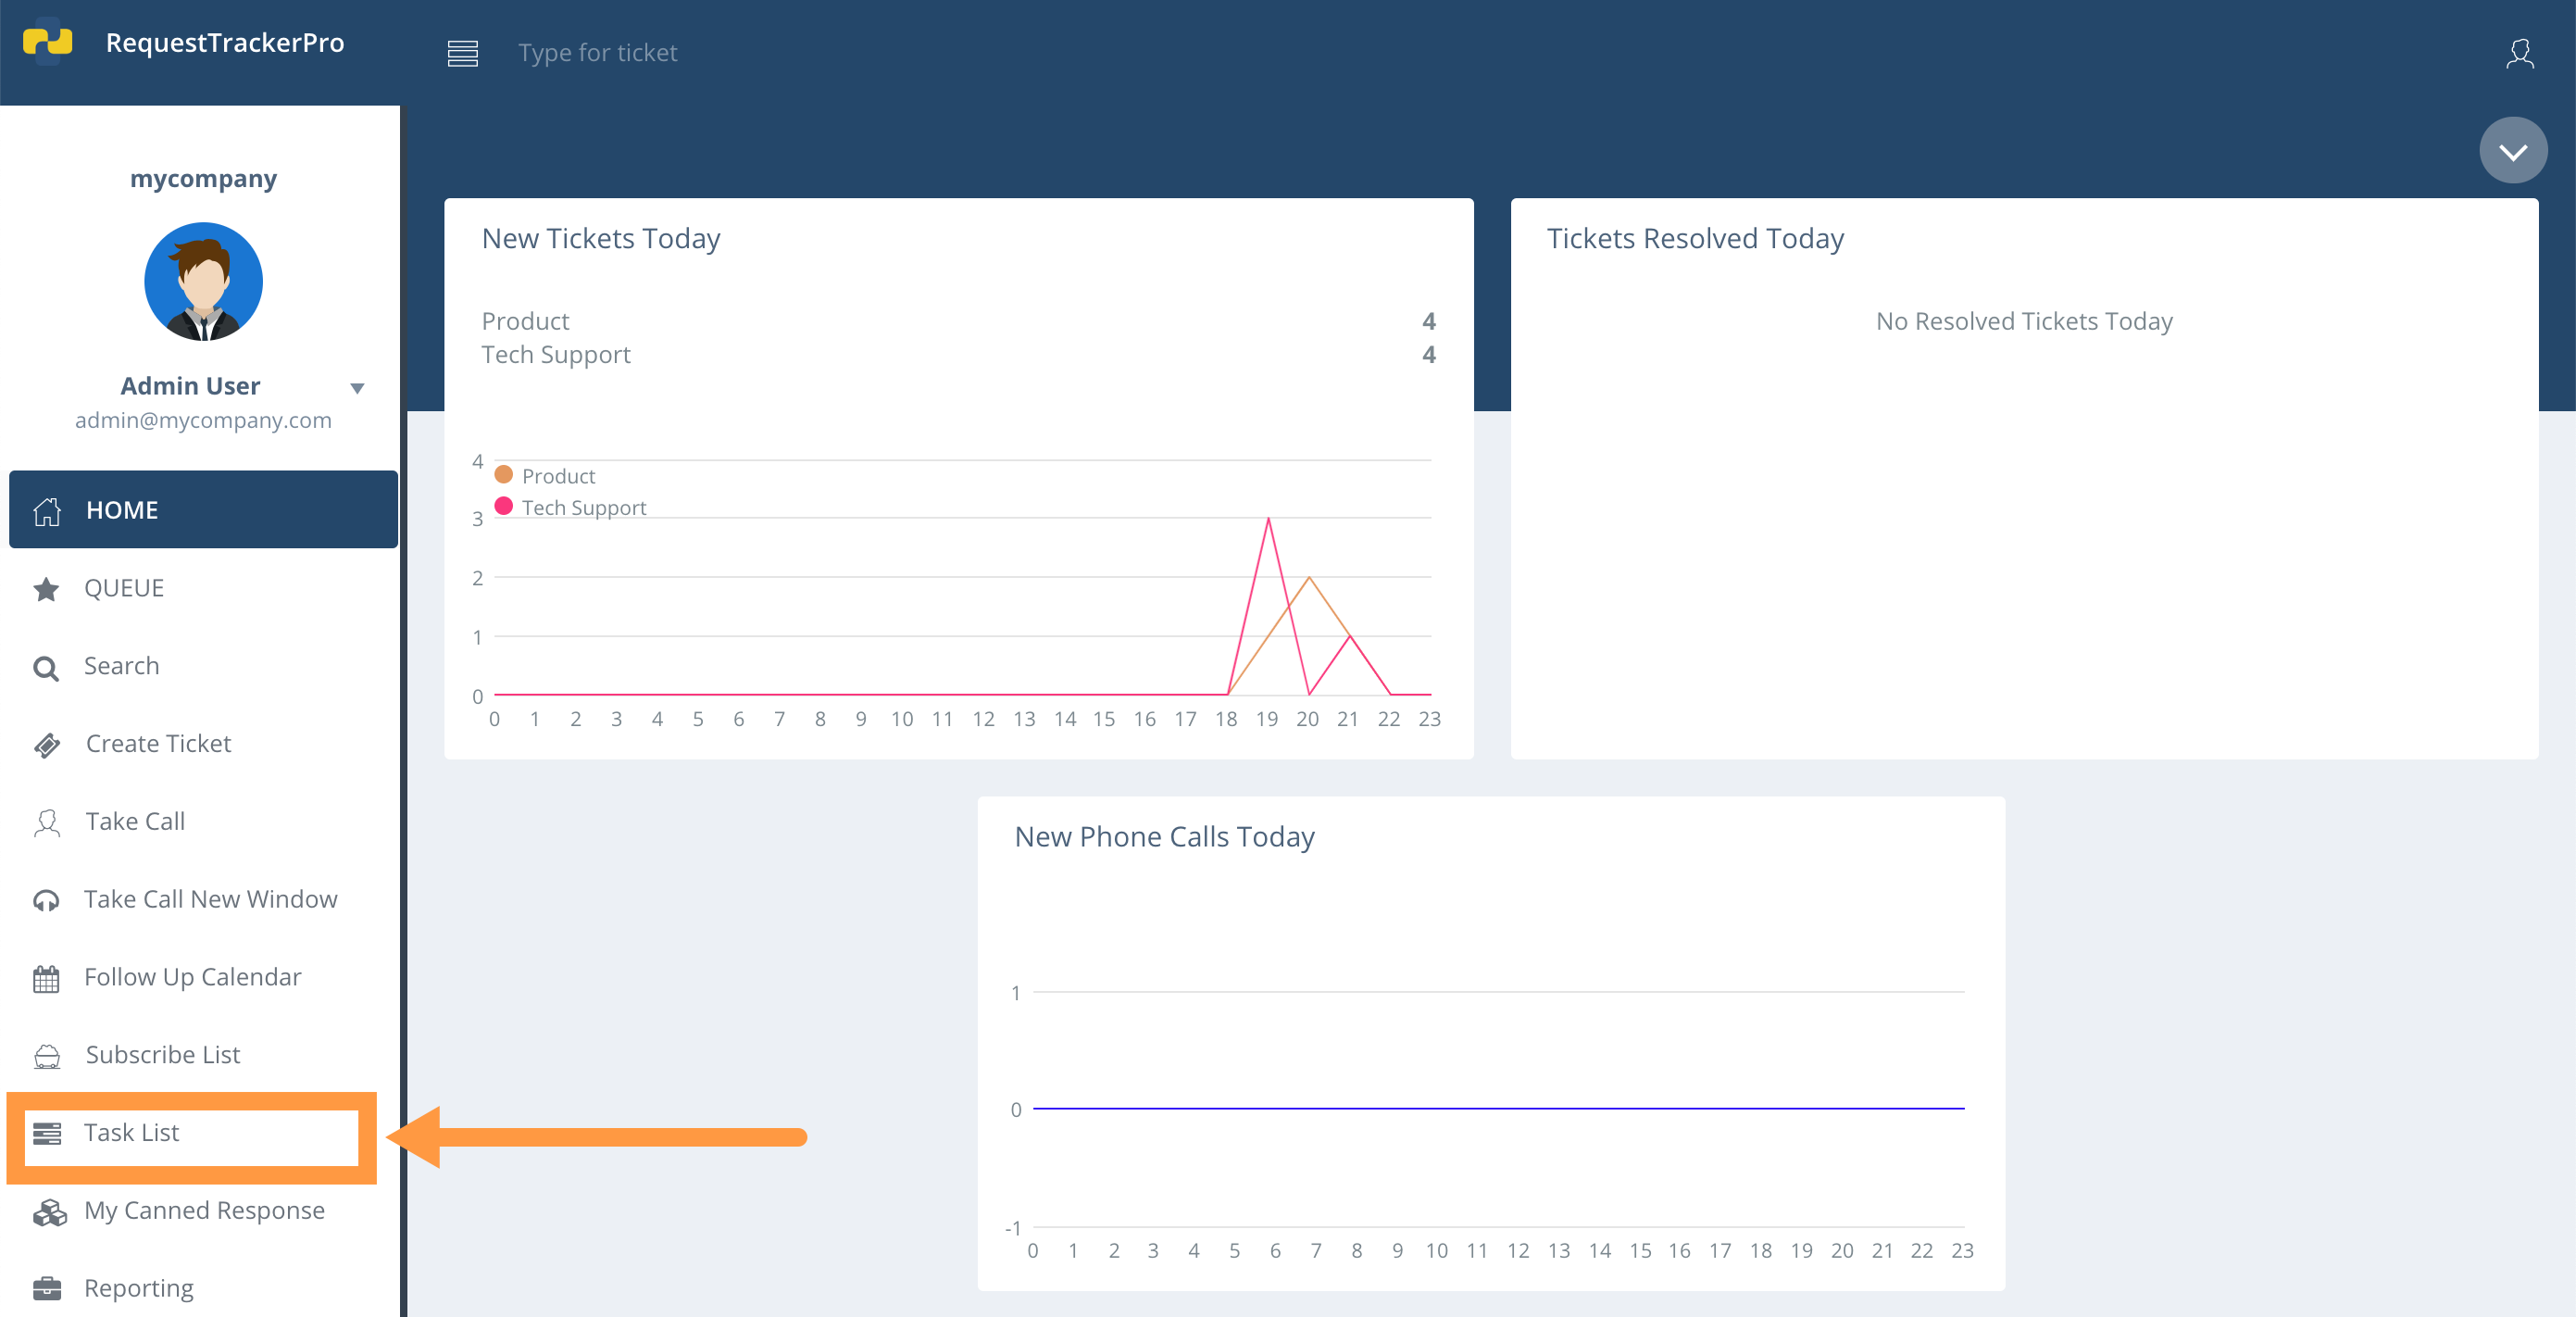
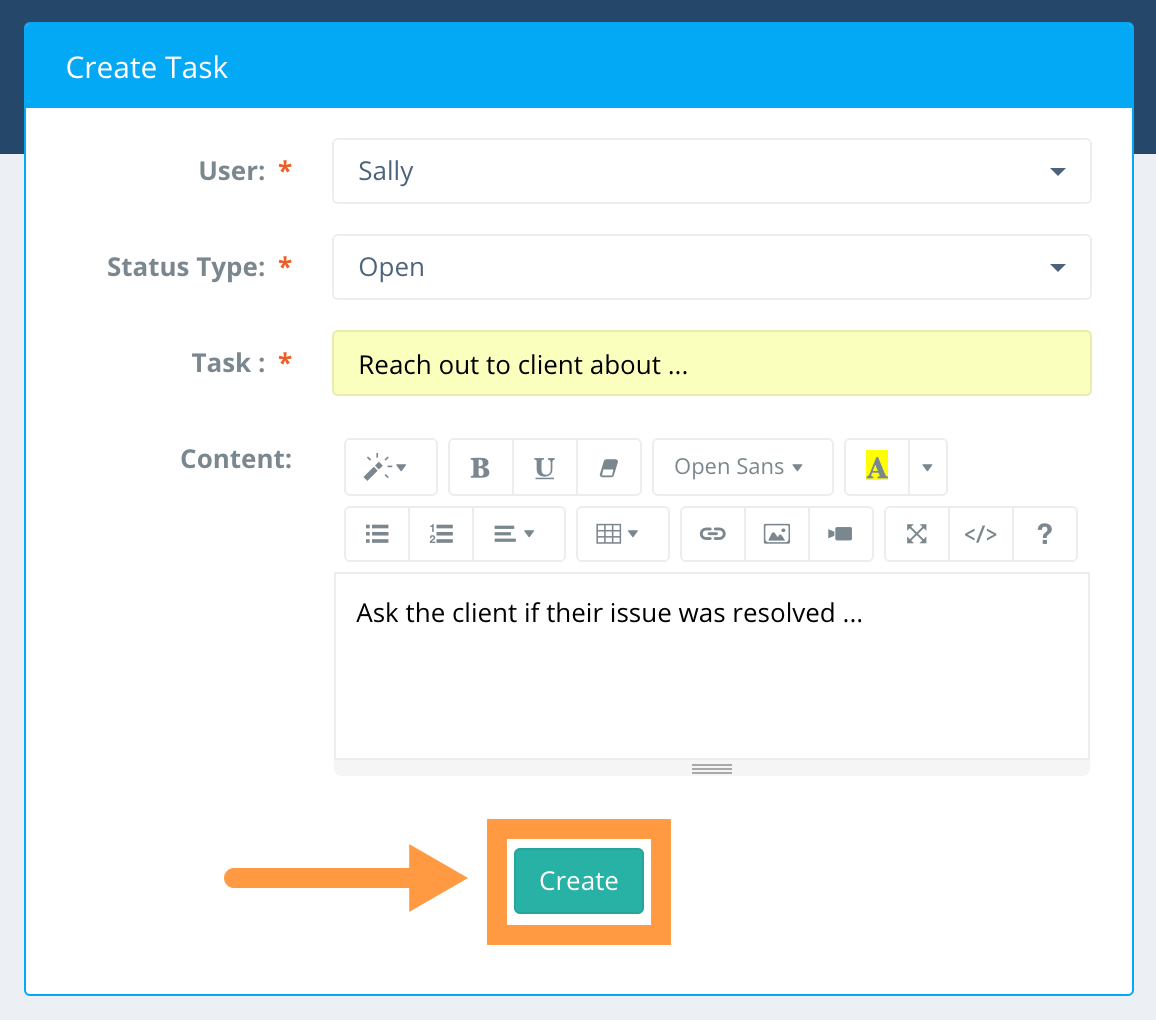
Create and Assign Tasks
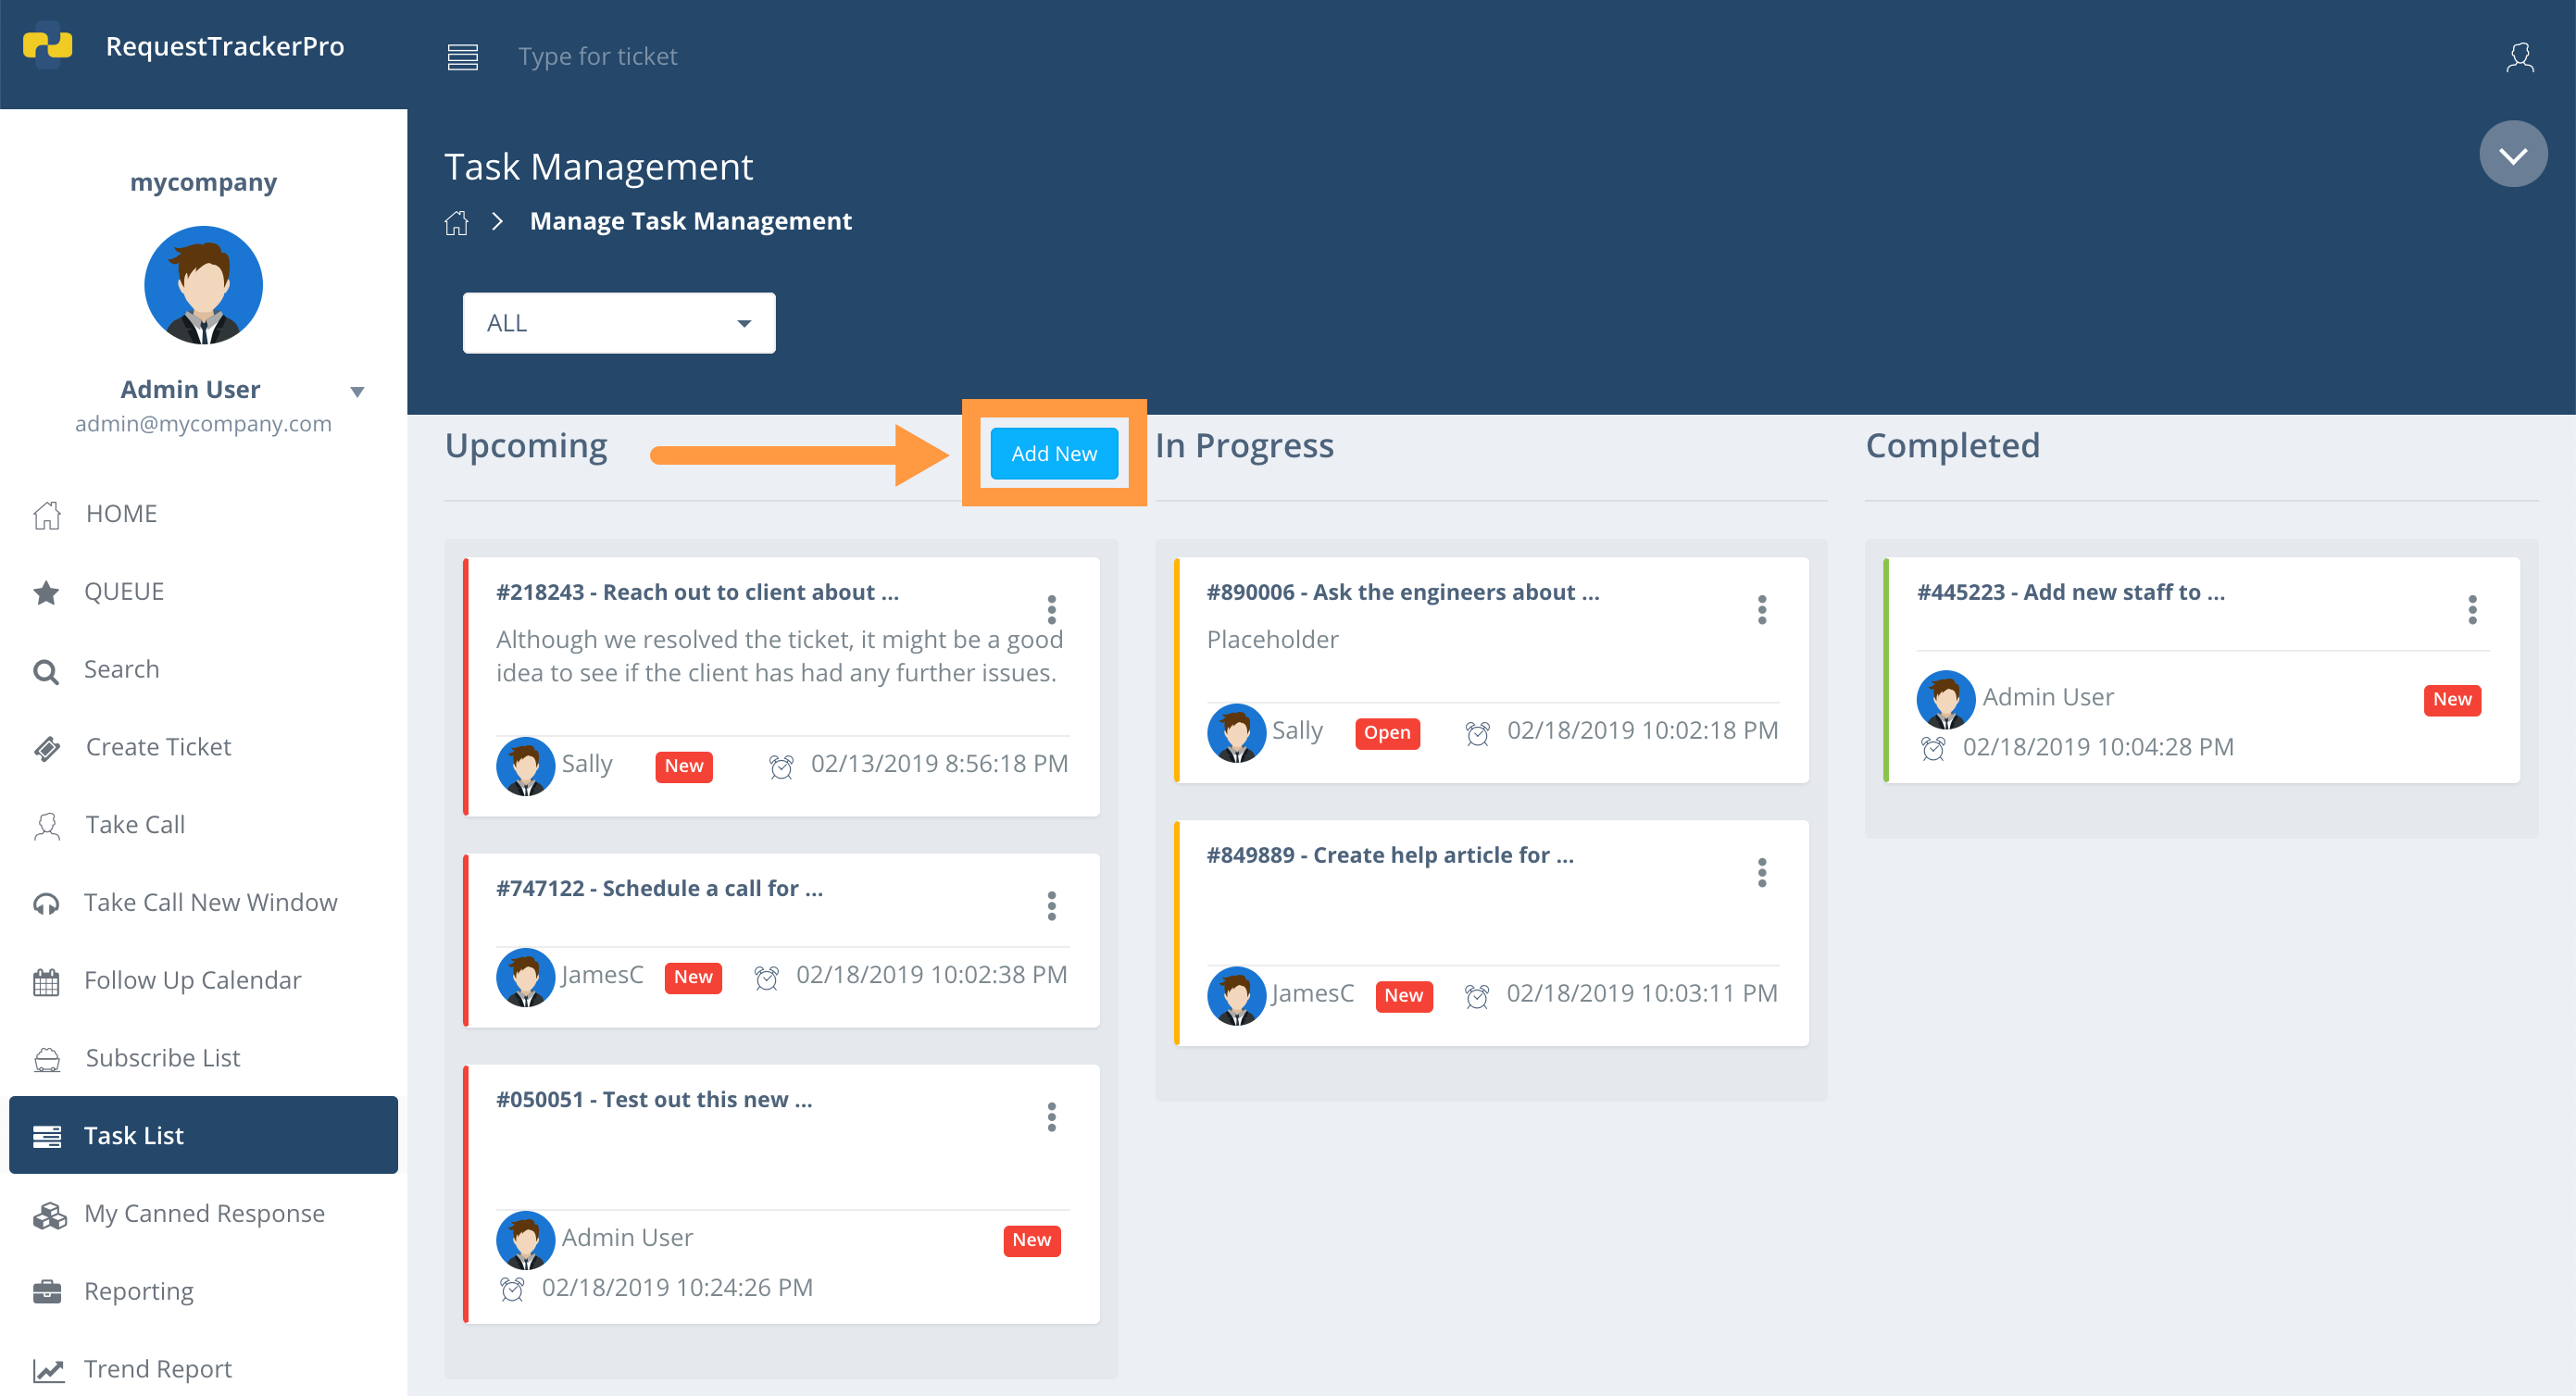
- Click Add New.

- Select a user to assign this task to.
- Select the status type for this task.
- Enter a name for the task, like “Finish the new help center article.”
- Optionally, enter information in the Content field. This can be as detailed and specific, or as broad and open as you like. You can also attach files, videos, and style the text using the control panel.
- When you’re finished, click Create.
Progress and Edit Tasks
- To edit a task, click on the icon next to the task, and click Edit.
- Make your changes, click the icon again, and click Save.
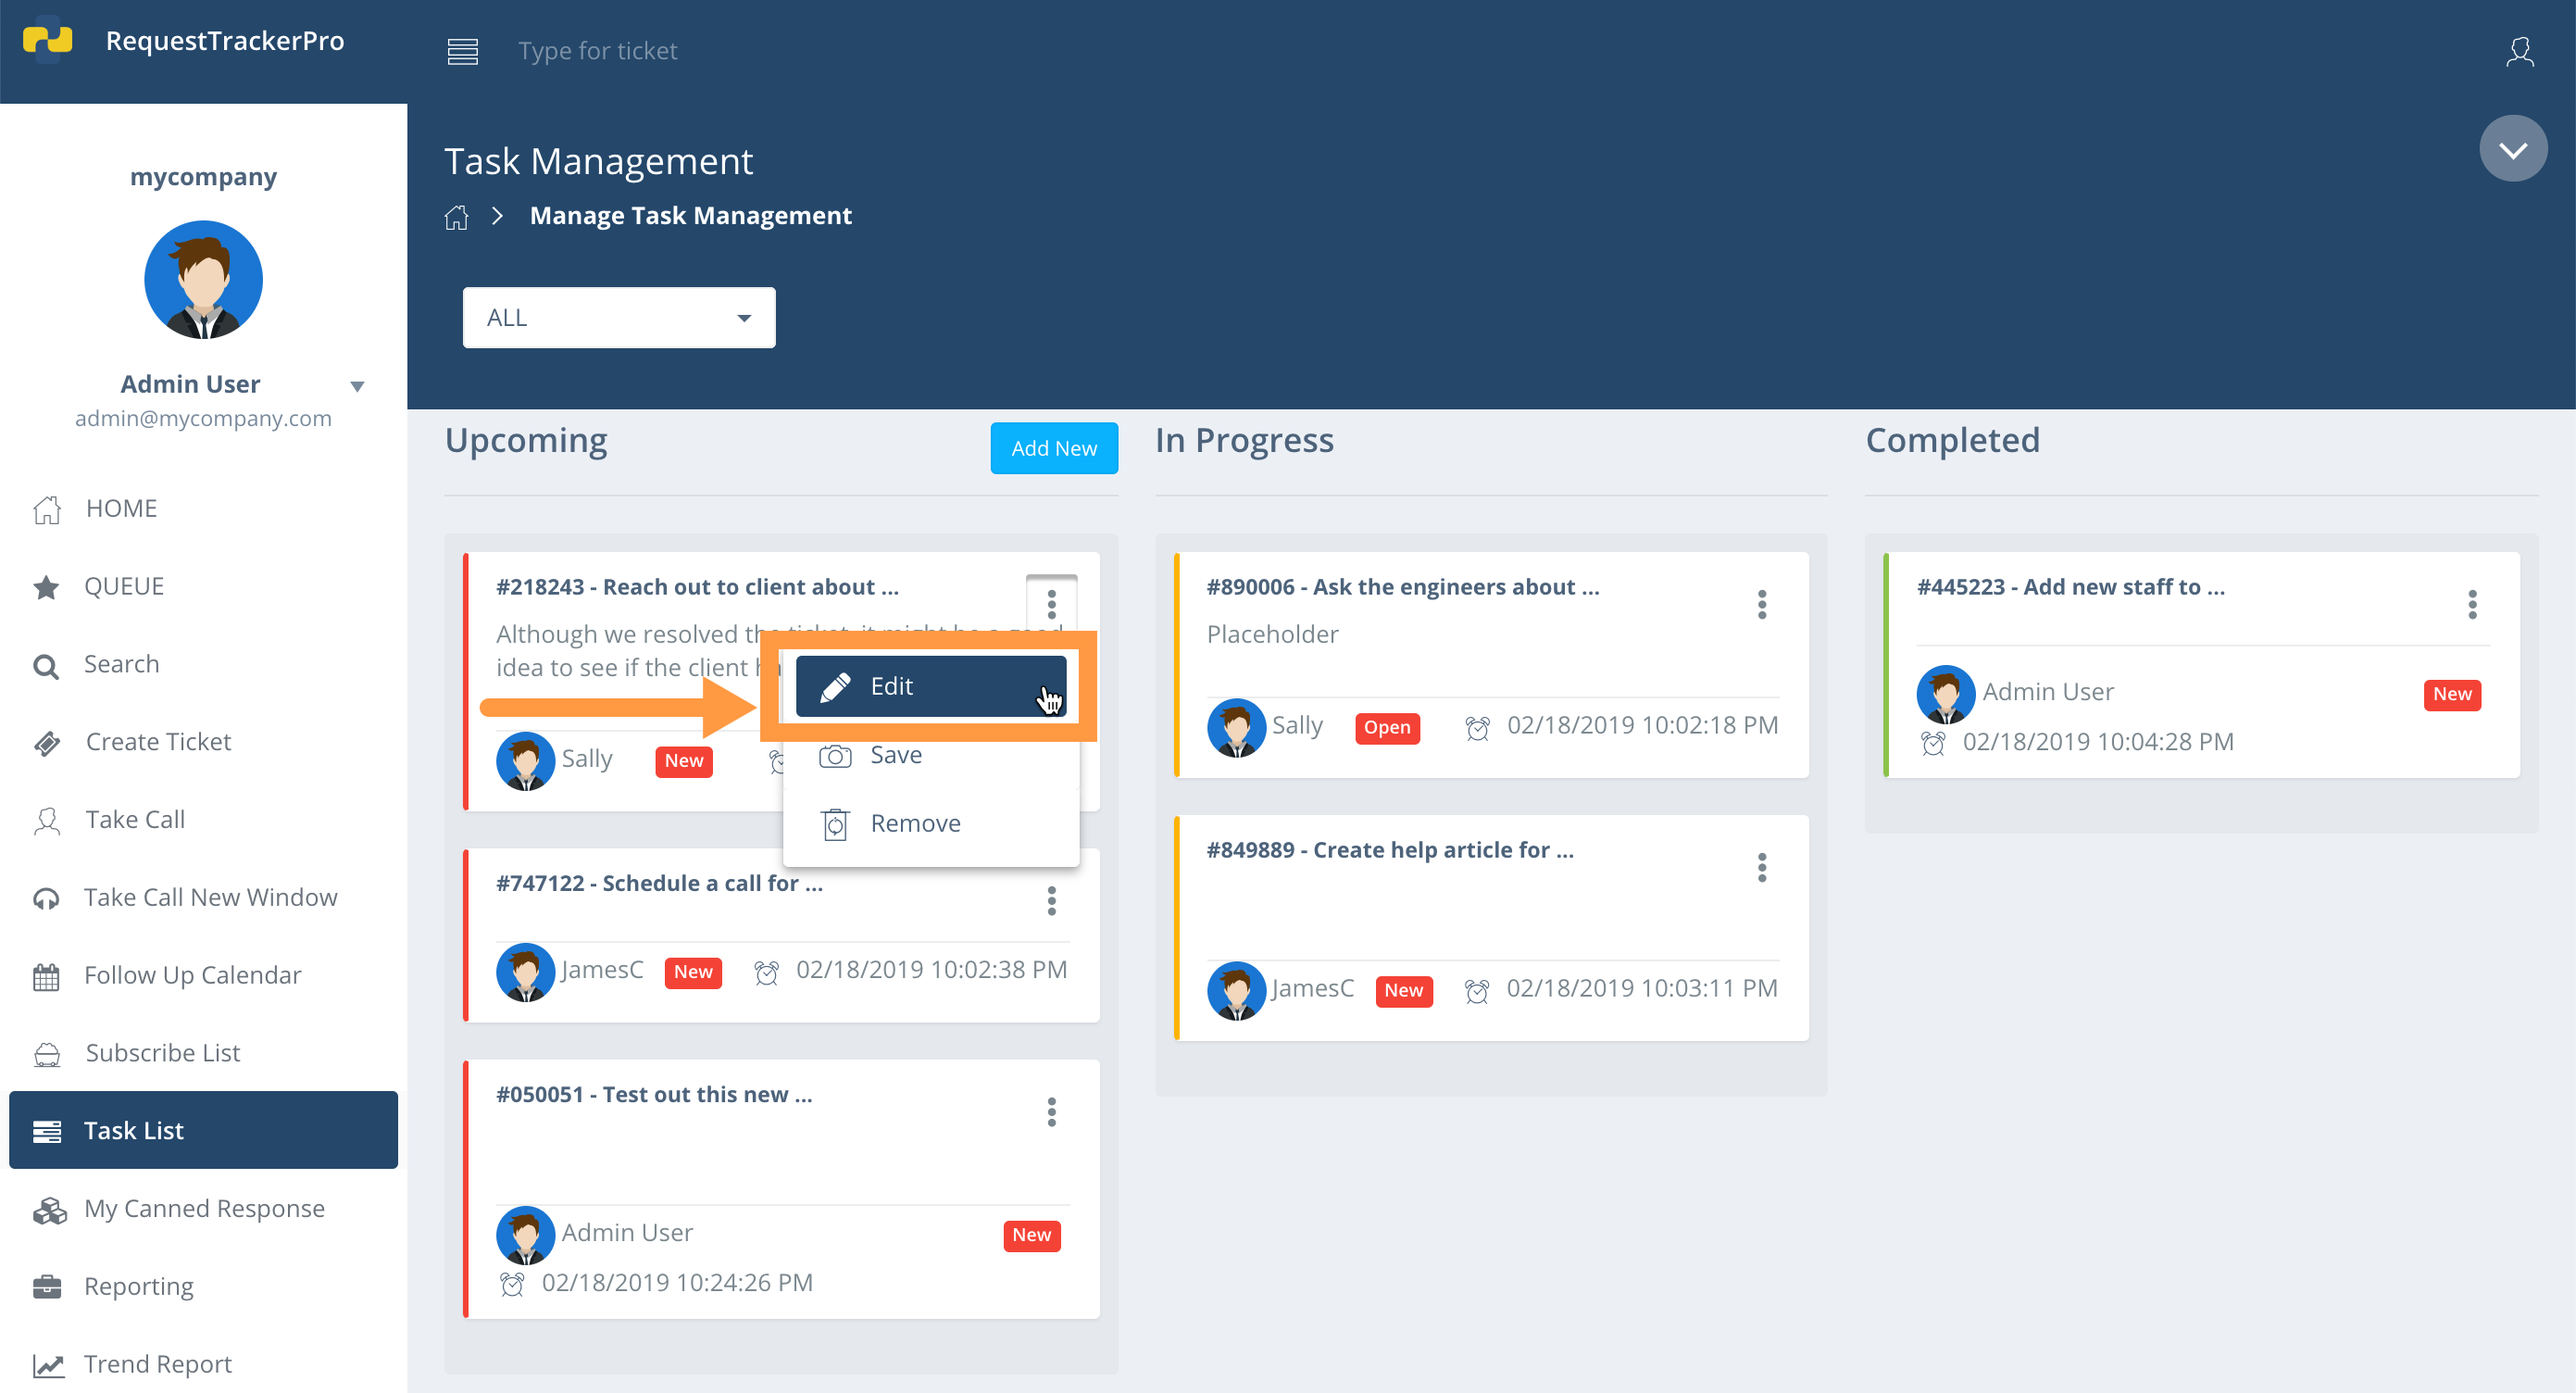
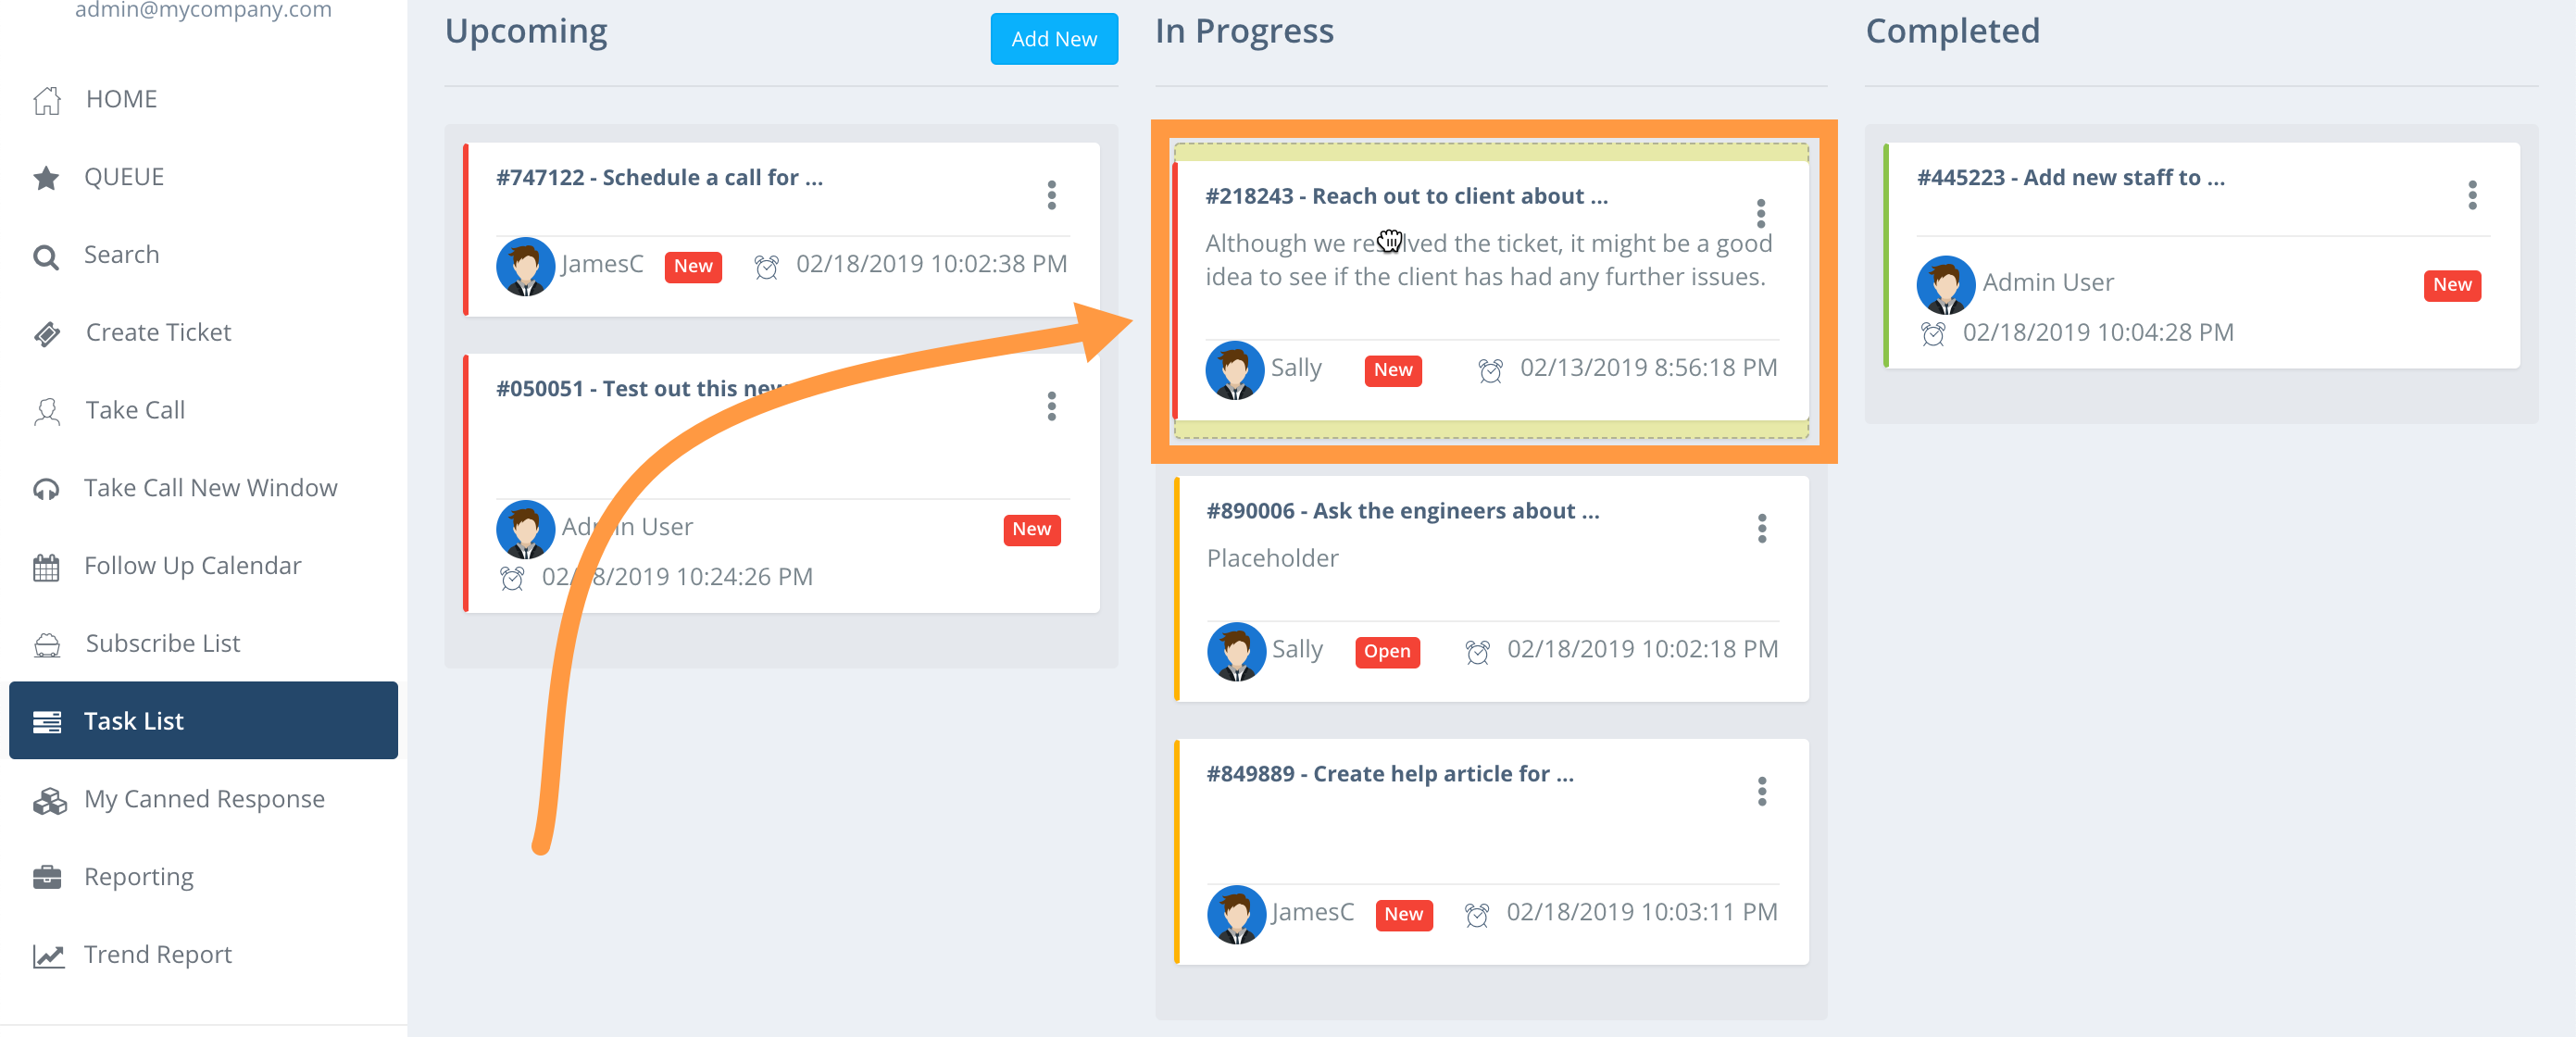
To progress or reorder a task, drag it from one column to another.