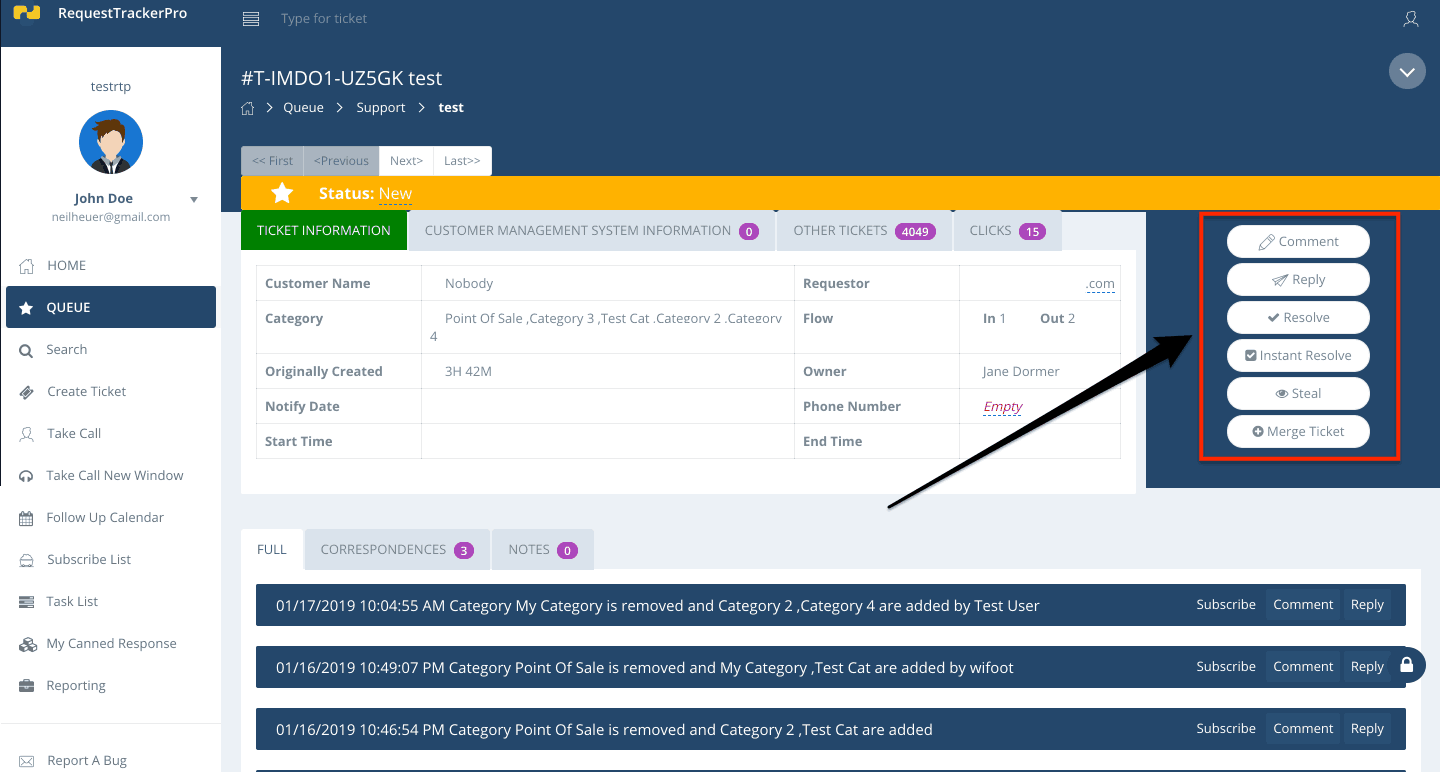
The Ticket Drill Down Screen, shown above, is where you view tickets. There are a number of options at your disposal so you can handle tickets efficiently:
Comment – This allows you to add notes to a ticket. Other agents can see any comments; however, customers cannot see comments.
Reply – This is where you can reply to a customers request. You can add categories, set a follow-up date, and type a message that will be sent to the customer by email or SMS, depending on how they originally contacted your company.
Resolve – This will mark the ticket as resolved and give you the opportunity to reply to the customer with a final message regarding the ticket. This option is identical to the Reply option except that it changes a ticket’s status to resolved once you reply.
Instant Resolve – This will resolve the ticket immediately, leaving no notes or replies for the customer.
Take / Steal – This lets you claim a ticket as your own, useful when you want other agents to know you are working on an issue. This button will say Take if no one is the owner. If someone else is the owner, it will say Steal. Choosing this option changes the ownership of the ticket to you.
Merge Ticket – This option combines two tickets from the same user into one. This is a very powerful function and should only be done when there is redundancy in the ticket options. When you click this button a window appears, listing other tickets and their subject from the same sender. You then select which ticket to combine the current ticket with.
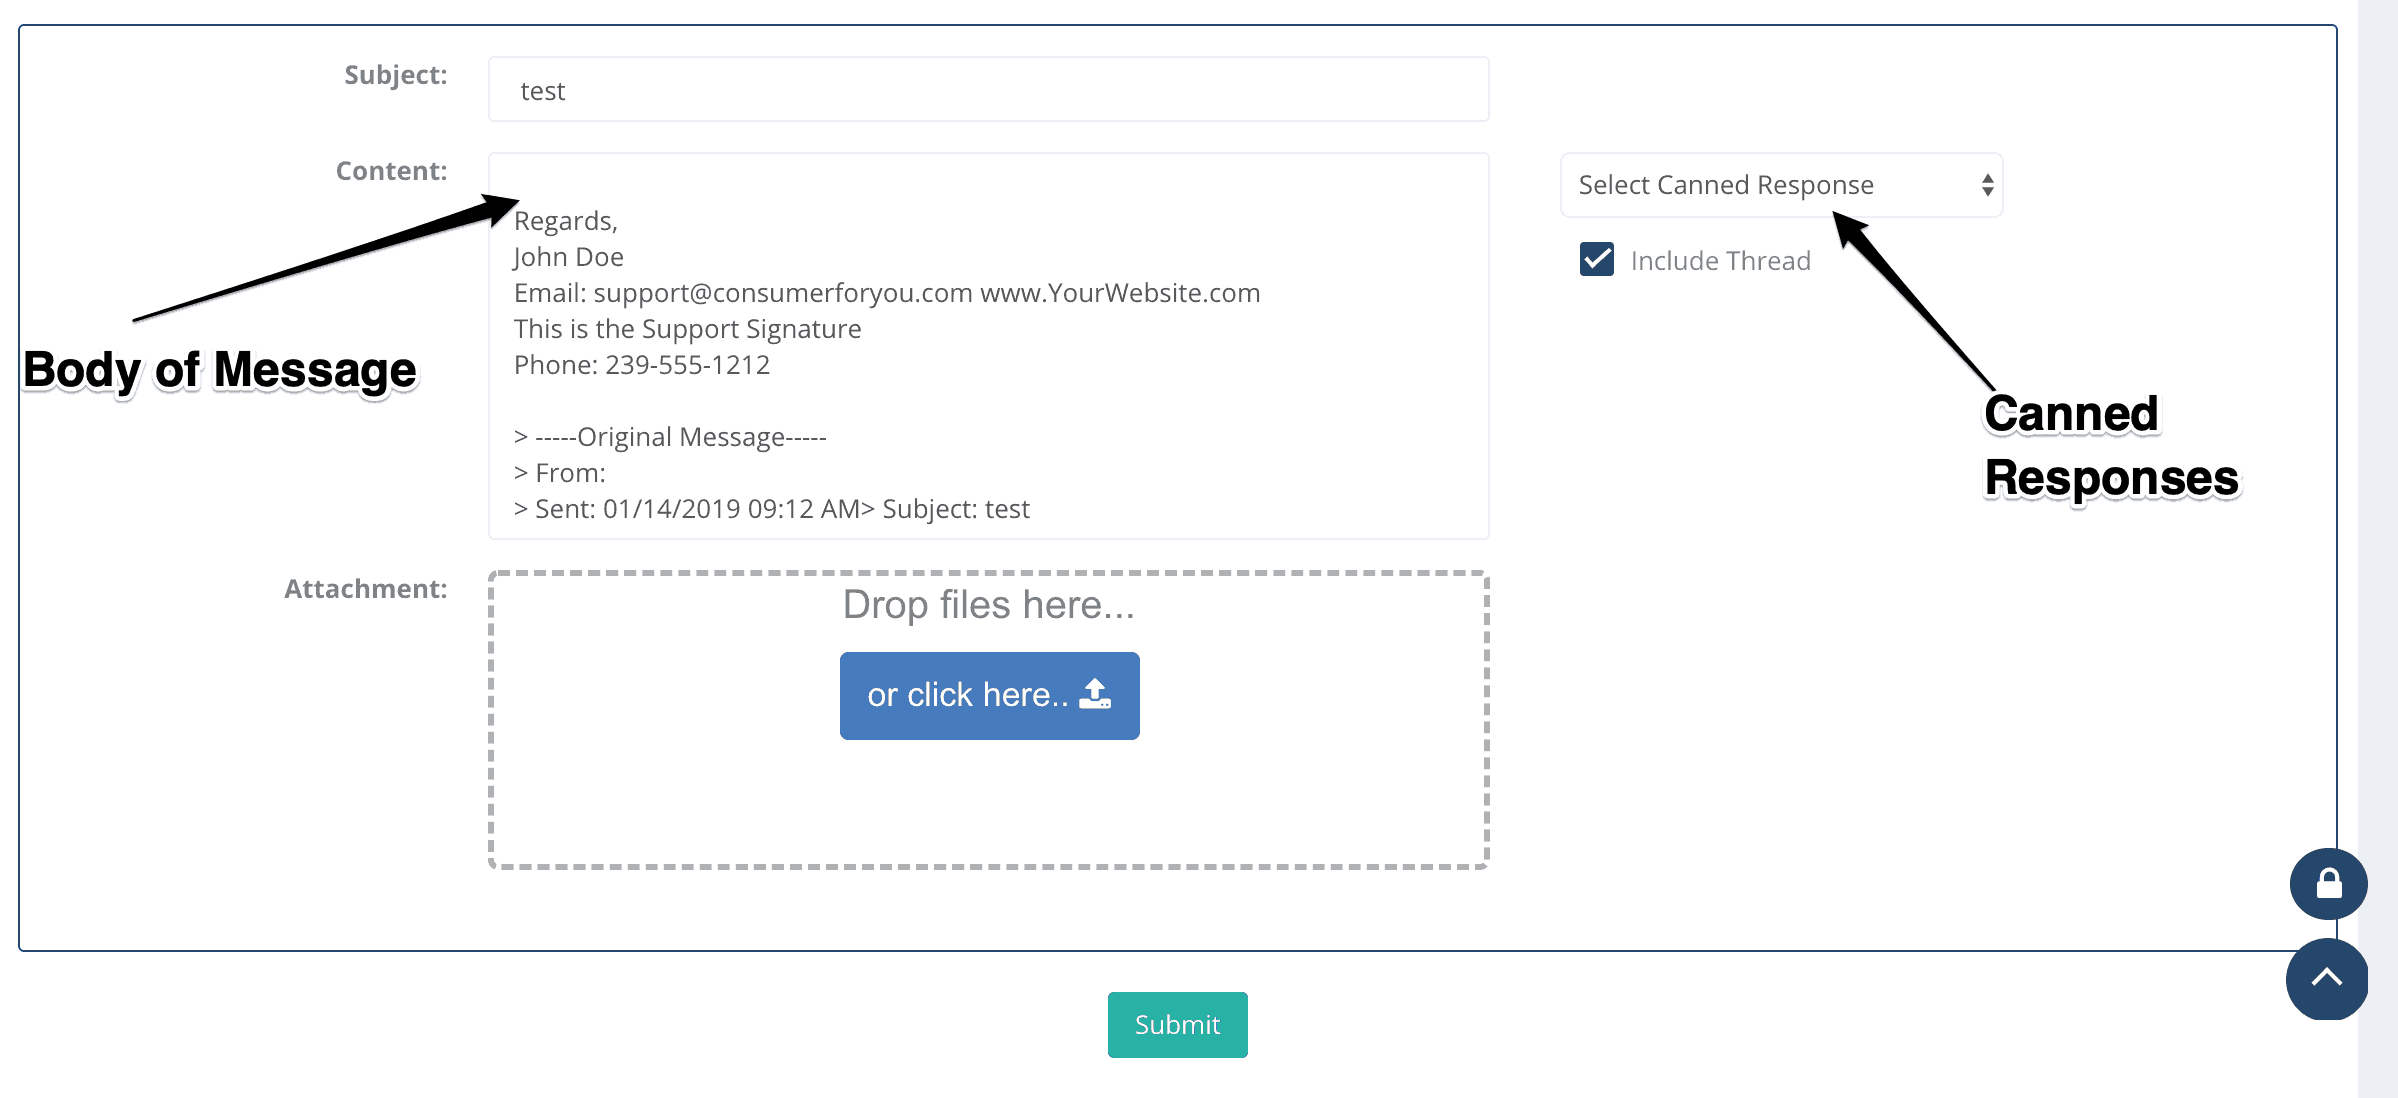
The image above shows the lower section of the reply screen. This is very similar to an email screen. You type your response to a customer in the Content box, similar to replying to an email.
If you choose a category with canned responses then you can select a canned response on the right side of the box. The canned response will fill into the Content box for you to edit or send off to the client. Just press the Submit button to email your response.